Generated with Monsha
Mechanical Keyboards: The Springy Engines of Typing
Lesson Plan · Year 2 · English
Mechanical Keyboards: The Springy Engines of Typing
Objectives & Learning Outcomes
By the end of this lesson, students will be able to:
- Identify the three main parts of a mechanical keyboard: the keycaps, the switches, and the brain (PCB).
- Describe the difference between a 'mushy' membrane keyboard and a 'springy' mechanical keyboard.
- Explain why mechanical keyboards are strong and how they can be changed to look fun.
- Understand how a spring helps a key pop back up after it is pressed.
Instructional Sequence
1. The Sound Search (10 minutes)
Goal: To spark curiosity through sound and touch.
- Introduction: Show the class two different keyboards—a standard office keyboard (membrane) and a mechanical keyboard with 'clicky' switches.
- Activity: Have students close their eyes. Tap a key on the membrane keyboard (quiet/mushy), then tap a key on the mechanical keyboard (loud/clicky). Ask: "Which one sounds like a tiny machine?"
- Discussion: Explain that today we are learning about 'Mechanical Keyboards'—keyboards that have tiny engines inside every single button!
2. What's Inside? The Anatomy of a Key (15 minutes)
Goal: To understand the mechanical components.
- The Switch: Explain that under every key sits a switch. Unlike a 'rubber bubble' in normal keyboards, a mechanical switch has a real metal spring. It works like a tiny pogo stick!
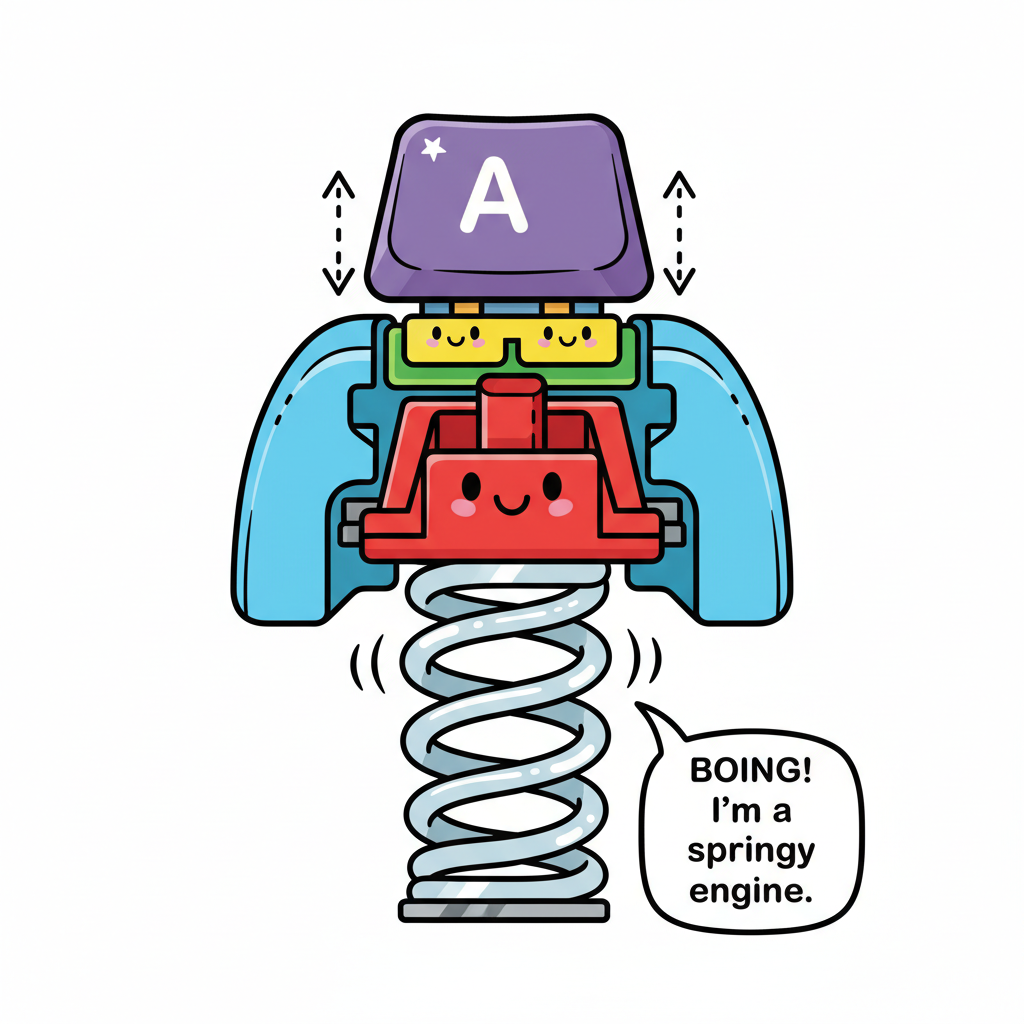
- The Keycap: This is the hat the switch wears. It has the letter on it. You can pop these off and swap them (Freewrite).
- The Brain (PCB): Explain that there is a flat board under the switches with tiny 'electricity roads' that tell the computer which letter was pressed (MelGeek).
3. Why Use a Mechanical Keyboard? (10 minutes)
Goal: To understand durability and customization.
- Strength: A normal keyboard might break after 5 million taps, but a mechanical one can handle 100 million taps! It’s like a superhero keyboard (Wikipedia).
- Personalization: Show the class an image of a colorful keyboard.
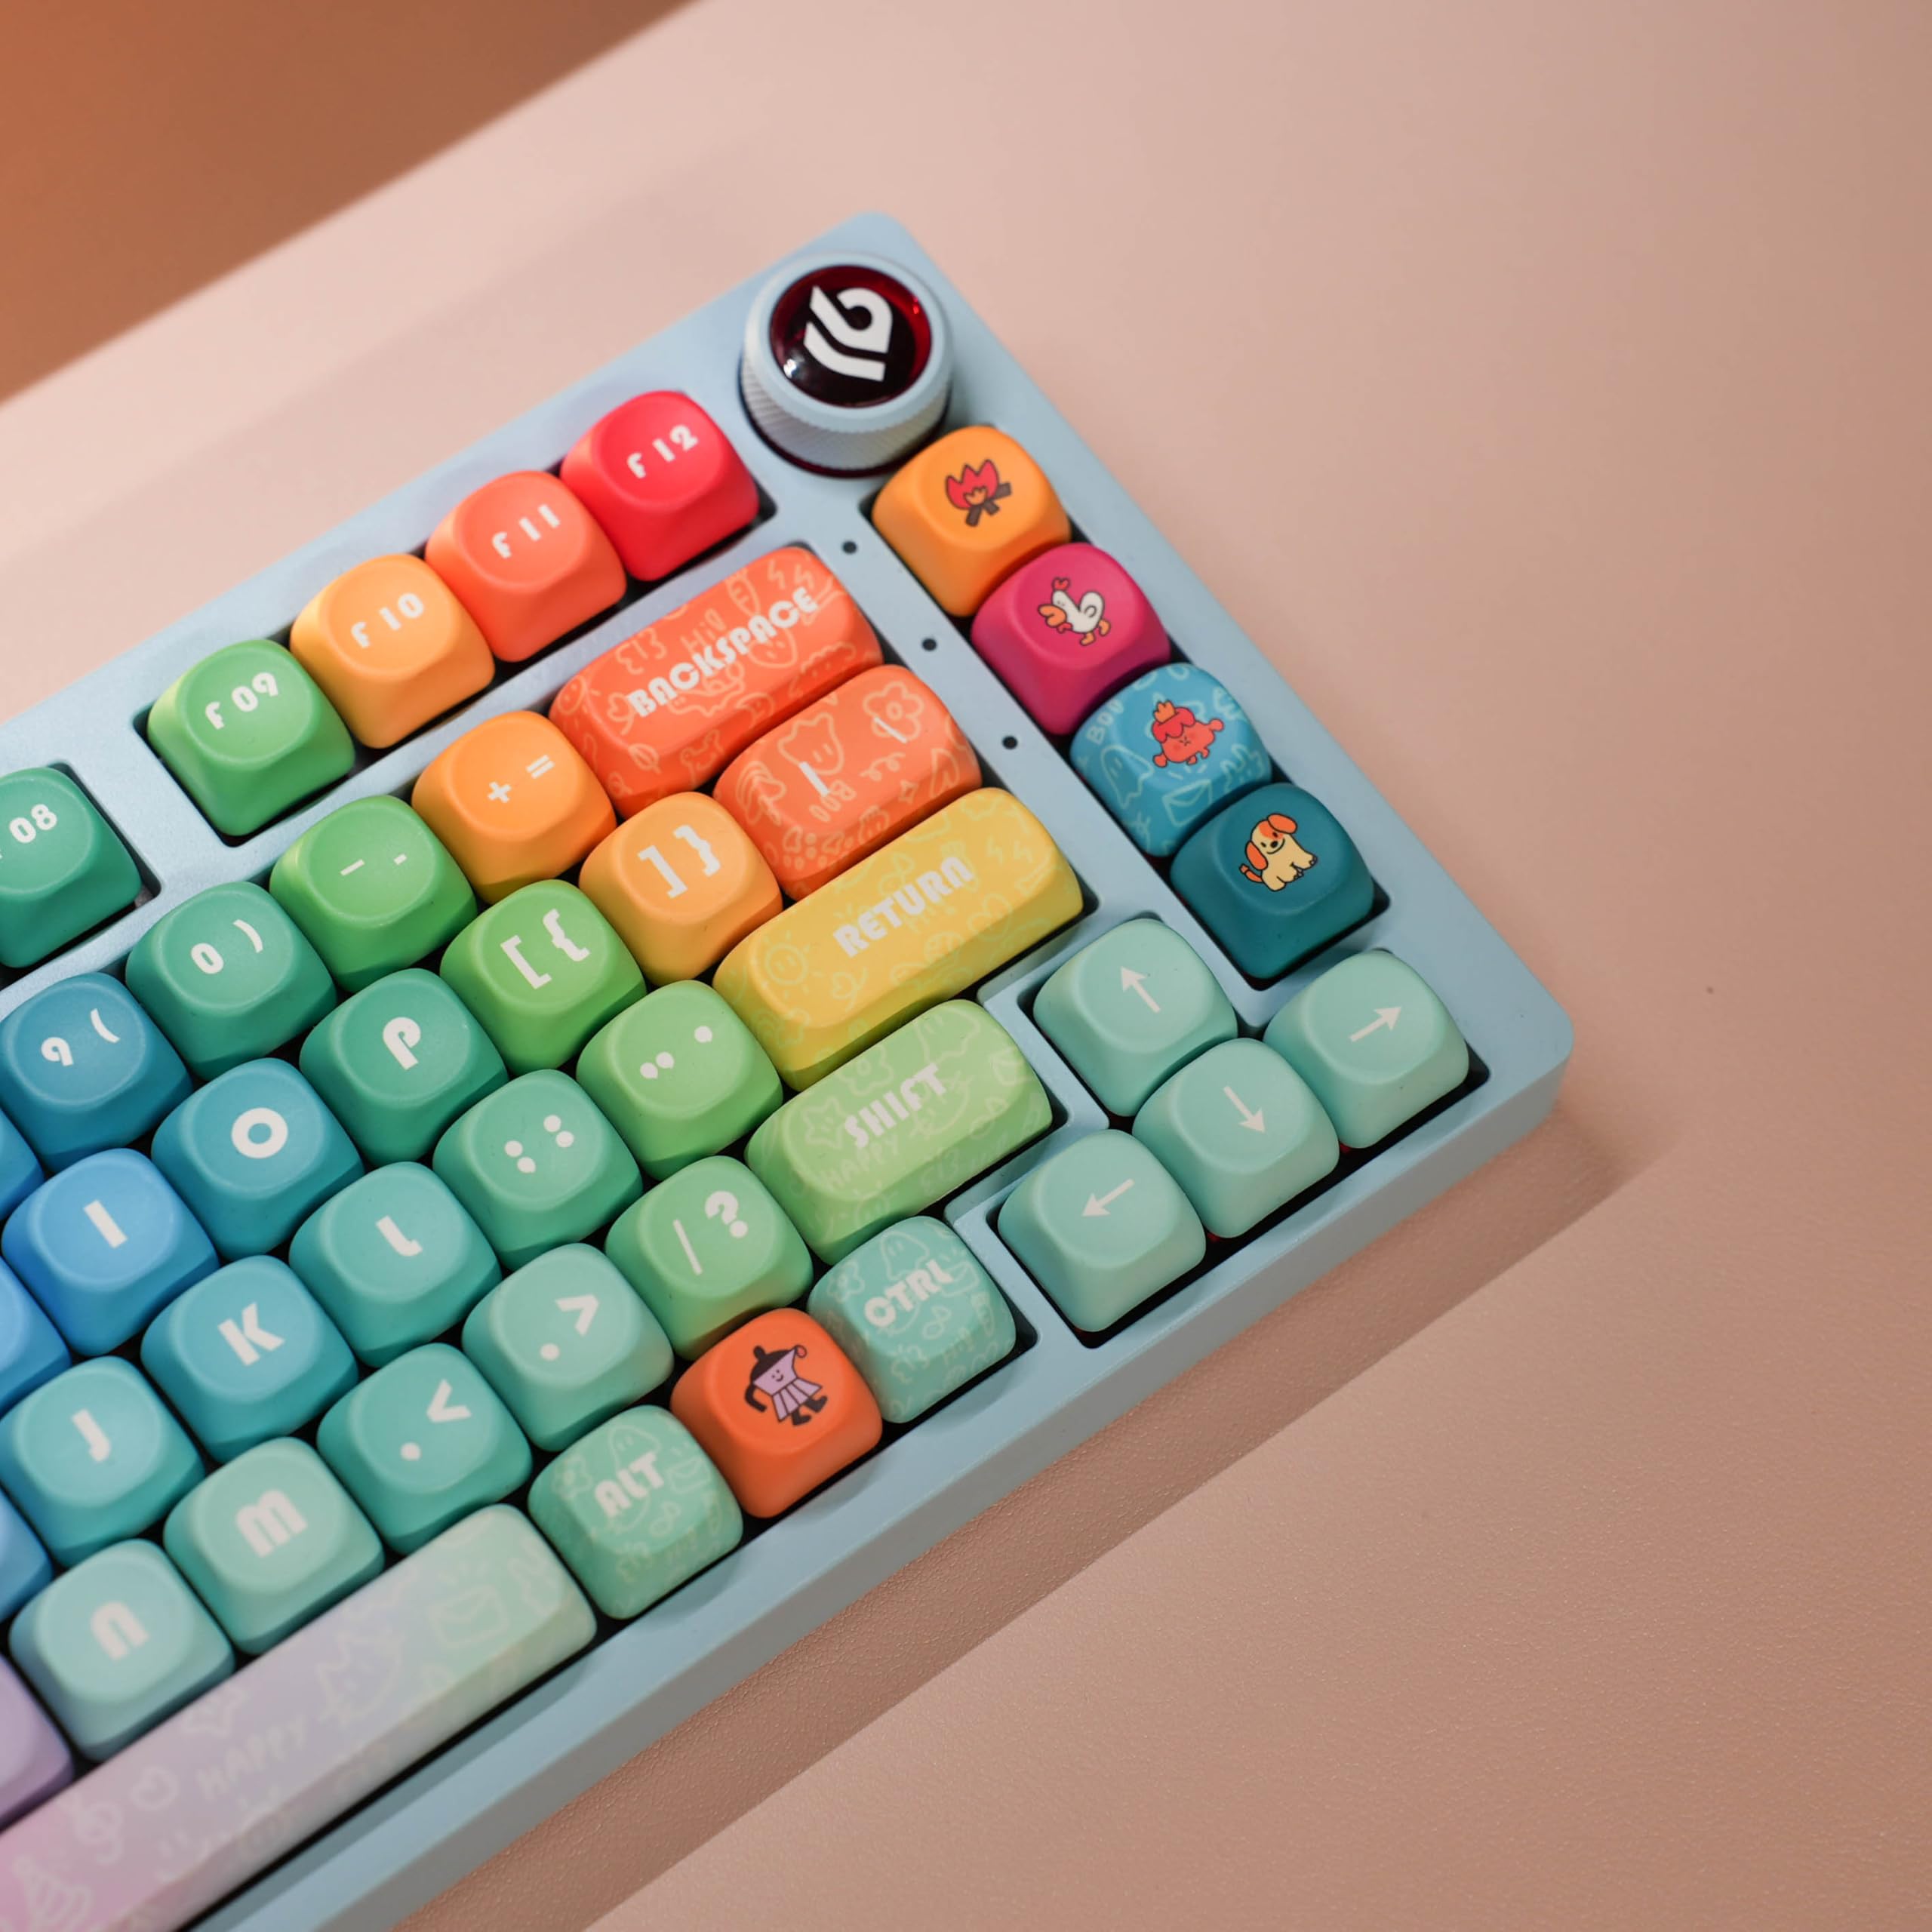
- Discussion: Because you can change the 'hats' (keycaps), you can make your keyboard look like LEGO, a rainbow, or your favorite cartoon.
4. Creative Activity: Build Your Board (20 minutes)
Goal: To apply knowledge of customization.
- Task: Hand out a paper template of a keyboard layout.
- Instruction: Students must 'design' their own mechanical keyboard. They can choose colors for different keys (e.g., all vowels are red, numbers are blue) and draw a tiny spring inside a 'cut-out' box on the side of their paper to show they know how the switch works.
5. Wrap-up & The 'Pogo' Test (5 minutes)
Goal: To reinforce the spring concept.
- Review: Ask students to stand up. Tell them to imagine they are mechanical keys. When you say "Press!", they should squat down. When you say "Spring!", they should jump back up quickly like a mechanical switch.
Assessment and Evaluation Plan
Assessment Type | Method | Success Criteria |
|---|---|---|
Formative | Class Discussion & 'Pogo' Test | Students can explain that a 'spring' is what makes the key pop back up. |
Practical | 'Build Your Board' Activity | Students successfully identify and color different parts of the keyboard and include a spring in their diagram. |
Summative | Exit Ticket (Verbal or Written) | Students can name one reason why a mechanical keyboard is different from a normal one (e.g., "It's clicky," "It has springs," "It lasts longer"). |
Critical Thinking Question for Year 2:
"If the spring in your mechanical keyboard broke, what would happen when you tried to type the letter A?" (Target answer: The key wouldn't pop back up / you couldn't type it again easily).